

How to prepare for a winter trek to Annapurna Base Camp
Here’s how to prepare for an independent trek, plus a little overview of each day to (hopefully) inspire your own Annapurna adventure.
Permits for the Annapurna Base Camp trek
First, you’ll need to get a few boring things out of the way. When you arrive in Kathmandu (or Pokhara) you’ll need to get a TIMS (Trekkers Information Management System) card, as well as a permit for the region you’re trekking.
Kathmandu: the tourist office in Kathmandu is a 15 minute walk from Thamel.
Pokhara: you can find plenty of permit offices around. Keep your eyes peeled as you roam the streets of Pokhara for a sign that says “Trekking Permits”.
Bring along two passport photos. If you’re already there and don’t have two passport photos handy, stroll the streets to find a sign that says “Passport Photo”. Most places won’t charge more than 200NPR for two photos.
The process to get your permits shouldn’t take longer than 15 minutes if you have everything with you in the first place.
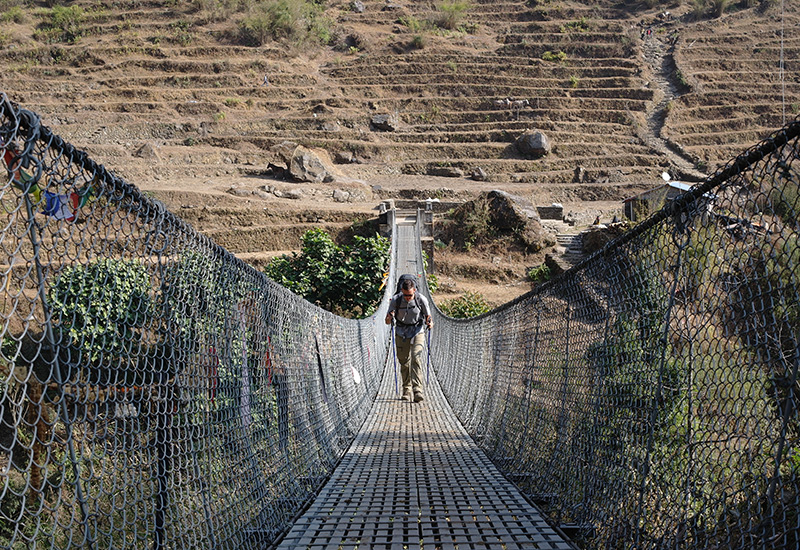
There are a number of bridges in Nepal called “New Bridge”. Don’t be fooled, half of these are not new.
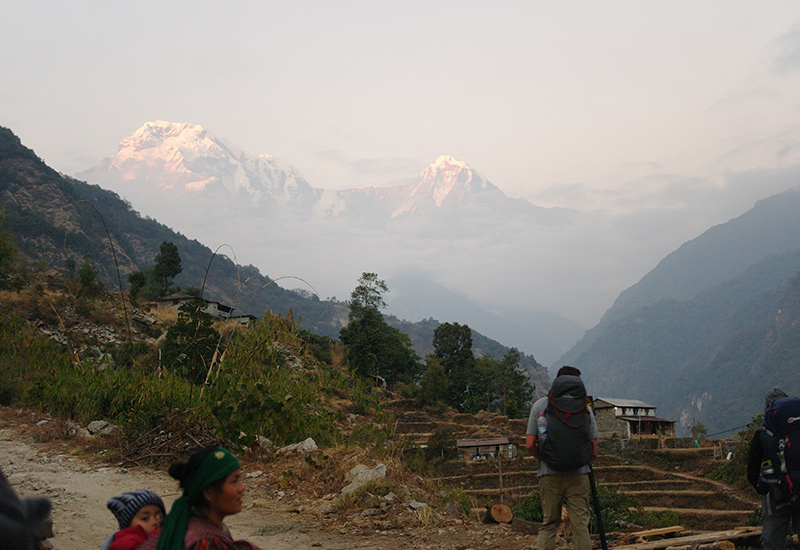
Getting to Annapurna
You’ve got a few options. Bus, private car, private Jeep, or taxi.
A bus from Pokhara to Nayapul shouldn’t cost you more than 200NPR. The more comfortable option, a private Jeep, will set you back approximately 2,000NPR. A taxi should cost something between those prices, just be sure to negotiate before you hop in – try starting around 1,000NPR and go from there.
We had the luxury of being driven around by our local guide (and friend), Bibek. We paid for his petrol, and he navigated the treacherous roads to Sewei, where we parked the car and started the trek.
Note: If you choose to start at Nayapul, you’re adding a whole day of walking along a boring, dusty road. The trek really begins just after Sewei, so try to catch a bus the whole way there in order to give yourself more time for the fun stuff.
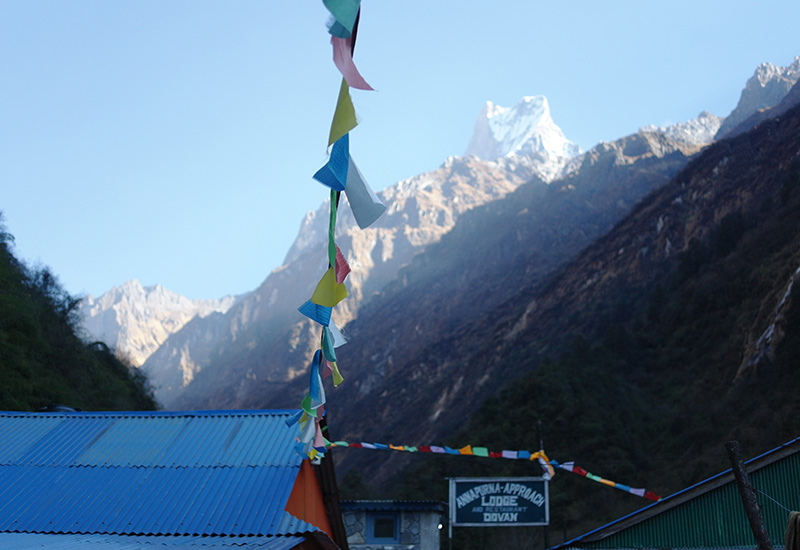
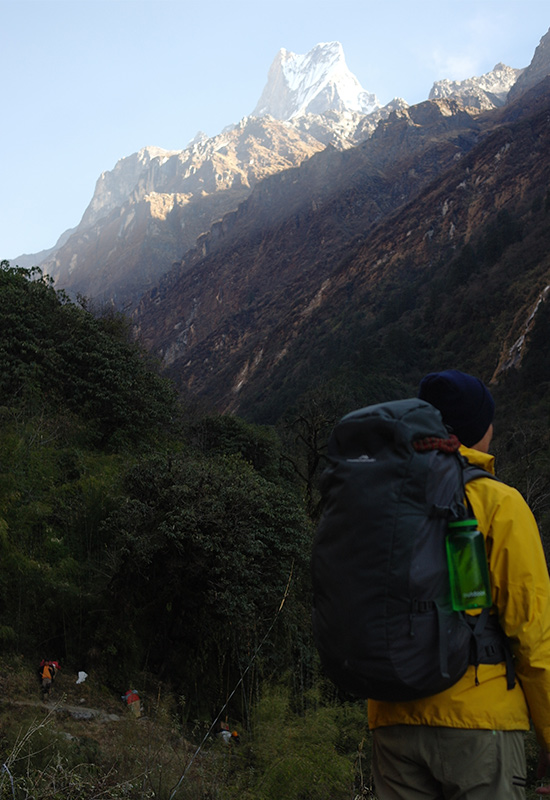
Machapuchare mountain, commonly referred to as “Fish Tail Mountain” is a sacred peak. Nobody, not even the best mountaineers, are allowed to climb it.
Exchanging money in Nepal
Do not even try to get NPR before leaving home. The best advice I found (thanks to TripAdvisor) was to bring your home currency with you, and exchange it in Thamel (or Pokhara). Shop around a bit to find the best rate, and then cash it in for some NPR.
It’s a good idea to spend every last cent while you’re in Nepal, as NPR is worthless outside of the country.
If you’re worried about not having local currency when you arrive in Kathmandu, exchange no more than $20 cash at the airport to pay for a taxi – the exchange rate at Kathmandu airport is about 10% less than what you’ll get in Thamel, but it’ll get you to your first nights accommodation. Otherwise, a taxi driver will likely accept a few USD or AUD for the ride, and if you’re unsure, let them know before you hop in.
Note: At the airport you’ll likely get followed to the taxi by a few fellas who’d like to help carry your bags. Ignore these men. They will ask you for a tip, and if (like us) you don’t have any NPR yet, you’ll likely get scammed into handing over the cash you have, which is potentially larger notes that you’re waiting to exchange. Be firm, say “No”.
Be sure to take enough cash with you for the entire trek. There are no ATMs, and no IOU notes will be accepted. We heard a story about a guy who had to rush the whole trek, because he’d not brought enough cash with him. Don’t be that guy.
A safe amount to bring would be approximately 15,000NPR. That’s roughly $165 AUD/$150 USD (2018). Not only will that definitely cover you for the whole trek, but you’ll have some left over cash to splurge on a private Jeep back to Pokhara – if you’re really keen.
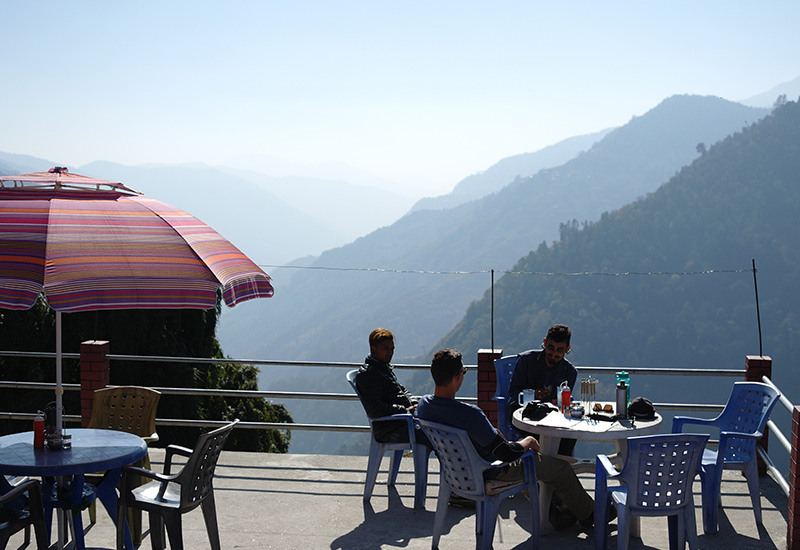
Teahouses are where all the fun stuff happens. Like, playing cards and sharing updates on how your bowels are going.
What to pack for a trek to Annapurna Base Camp
This depends on whether or not you’re going with an independent guide, a trekking company, or doing it solo. We went with an independent guide, so carried everything ourselves, with the help of one porter (between three people) to carry the bulky stuff – such as sleeping bags.
Make sure you have a great pair of hiking boots. I wore a pair of Merrells throughout Nepal and South America.
My pack weighed in at just 6kg. Using packing cells, I managed to keep the bag nice and tidy day-in-day-out.
What’s inside my 65L backpack
For the full list, click here.
What I wished I’d packed
- Aqua ear – just in case you get an ear infection after a dip in Jhinu Hot Springs.
- Eye drops – the dust will likely irritate your eyes. Eye drops would have been a great help to ease the sore eyes after a day of having dust kicked into my eyes.
- Carabiners – a great option to hang accessories on the outside of your bag, like a water bottle.
- A larger towel – unfortunately I took that lightweight packing thing too far, and carried a tiny towel with me.
- More bobby pins and hair ties. Don’t ask why I didn’t bring a whole pack.
- Probiotics and multi-vitamins. Unfortunately I packed everything but these two essentials. Luckily, my good friends lent me some of their stash.

What to expect when it comes to food
Re-fuelling your belly is probably the biggest concern, amirite? The good news is, staying full won’t be a problem on the trail.
Meals get more expensive the higher you go (so do the mandarins if you choose to purchase them from someone on the trail). Expect to fork out approximately 300NPR every time you sit down to eat – depending on how big your appetite is, give or take 100NPR.
Menus offer everything, from momos to pizza. A few of our personal favourites were: gurung bread with cheese, chapati, chocolate pancakes (especially from the top teahouse in Bamboo), and a plate of fried rice was always a fulfilling option.
My biggest piece of advice, don’t pack food into your bag. Maybe a few muesli bars or a pack of trail mix – but don’t got nuts.
Most of us avoided meat along the trail, but if you’re trekking during winter (like we did) meat quality shouldn’t be too much of a concern. From what I’ve heard, meat is more of a worry in the summer months, when storing meat at cooler temperatures might become an issue.
Tip: Breakfast is never served before 7am, so if you want to start trekking earlier, you might need to stop for breakfast at the next teahouse along the trail. Or, BYO breakfast in the form of muesli bars.
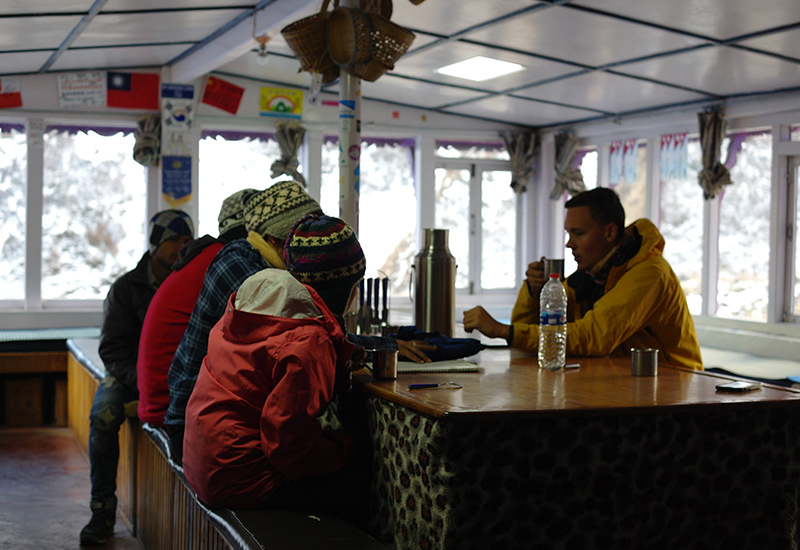
Enjoying lunch at MBC.
Staying hydrated
If you take two re-fillable 1L bottles with you on the trail, you can refill these for approximately 50–100NPR/litre each morning at a filtered water station.
Others recommended I pack a steripen or water purification tablets (which I did), but I paid $30 for the water purification tablets back home, and didn’t use them.
I did, however, refill two 1L water bottles every morning for a total of 200NPR. That came to a total of 1,200NPR for water (approximately $13 AUD) for the duration of our trek.
Plus, if you bring your own water bottles, you won’t add to the plastic waste issues on the trail.
Wi-Fi and charging devices
Wi-Fi is available at almost every teahouse (except for one we visited in Bamboo). If you choose to stay connected during the trek, expect to pay approximately 100–200NPR.
We didn’t use the Wi-Fi until we reached Deurali, but connectivity was pretty damn good (compared to slow-poke internet speeds back home in Australia).
It’ll cost anywhere between 100–200NPR to charge a device. There are no power points inside your teahouse room, so you’ll have to use the communal charging ports in the common area. Charging ports are international, so you shouldn’t need to bring a power adapter – feel free to do so just to be on the safe side.
Do you need to book ahead in winter?
We never had any issues finding a spot in a teahouse, and we were constantly rolling in after 4pm or 5pm. In busier seasons, this would be an issue. However, in the middle of January the trail is quieter.
If you’ve got a porter helping you out, they’ll likely run ahead and snag you a spot. To be on the safe side, start the trek early to be at your final destination before 3pm.
Expect to pay 100–200NPR for a bed in the teahouses. Prices will rise as you go higher, but never more than 250NPR.
Tip: You’ll always pay the final bill on the morning before you depart. If you’re planning to start your trek before 7am, pay your bill the night before to avoid disappointment when the teahouse staff are still sleeping – or worse, you’ve woken them up to leave at the crack of dawn.
Our 6 day Annapurna Base Camp itinerary
Day 1 – We drove from Lumle to Sewei, where we parked the car. Trek 7.5km from Sewei to Jhinu Danda (1,710m)

Checking the map in Kyumi.
Day 2 – Trek 9.3km from Jhinu Danda (1,710m) to Bamboo (2,335m)
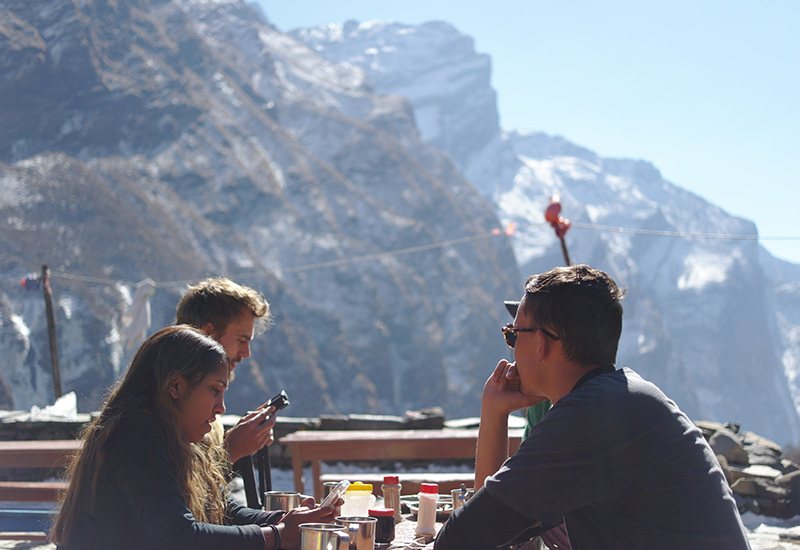
Enjoying the views and momos for lunch in lower Sinuwa.
Day 3 – Trek 4.7km from Bamboo (2,335m) to Deurali (3,230m)
Get started before 8am to make the most of your days on the trail.
Day 4 – Trek 6.7km from Deurali (3,230m) to ABC (4,130m)
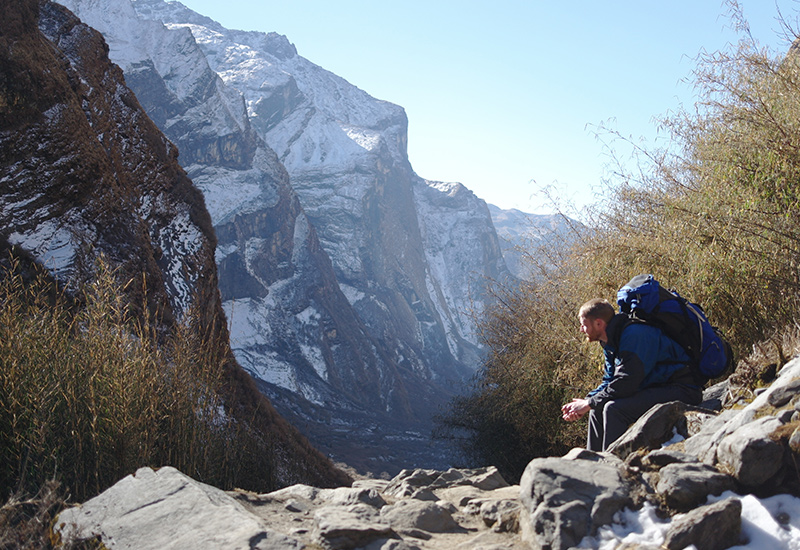
Fraser is considering his life choices on the way to MBC from Deurali.
Day 5 – Trek 11.4km from ABC (4,130m) to Bamboo (2,335m)
Suvini and I started early, as she was suffering from seriously bad altitude sickness. Bonus points for scoring a wicked sunrise on our way down to MBC.
Day 6 – Trek 16.8km from Bamboo (2,335m) to Sewei
We completed the trek just as the sun went down. What a way to finish.
Then, we hopped in the car, and got ourselves to the nearest shower.
13 bonus tips before you trek to Annapurna Base Camp
- Go slow from day one.
- Don’t rush the start and go slow when you reach 2,500m altitude. Take it easy from the beginning. You’ll surprise yourself on the way back down – we took four days to get to base camp, and just two back.
- Drink at least 2.5L of water a day.
- Pack only what you need. If you’ve got the budget, spend extra on merino wool clothing – I wore the same thermals for six days straight, and didn’t smell too bad (IMO).
- We had great weather, but just stay on top of changing conditions. Three days before we started the trek, a blizzard smashed ABC. By the time we got there, the trail was snow-free. But, you never know when a cold-front is due.
- Take altitude sickness very seriously. If one of your friends wakes in the middle of the night and says their vision has gone blurry and their headaches are unbearable, descend with them immediately. Pop on that head torch, and take them to a lower altitude. Do not wait until morning.
- Buy yourself some trekking poles. Yes, they look dorky, and some say a stick will do just fine. But, you’ll thank yourself when you’ve got the choice to extend them on descent, or shorten the poles for when you’re climbing uphill.
- Pack a decent sleeping bag if you’re trekking in winter. Mine was graded to -8ºC, and it did the trick just fine. But those blankets will not be enough to keep you warm.
- Do not forget a deck of cards. Not only will you make new friends, but you’ll while away the early hours of the evening.
- Don’t expect much from the showers. Know that 97% of people you walk past won’t have showered in days. Enjoy the freedom.
- Western toilets are few and far between, but there’s a reason squatty potties were once invented. Embrace it.
- Don’t rush the trek. In all honesty, we could have easily stayed a night in Kyumi and left that last few kilometres to complete on the seventh day, but we were keen to get off the trail and into a hotel.
- You can easily do this trek yourself. No need to hire a guide – and if you pack light, don’t worry about a porter. Just study the map, be prepared for changes in weather, and make friends on the trail. It’s well marked, you’d literally have to step off a cliff to get lost.
Note: Distances were calculated using a map on our guide’s phone. These may or may not be accurate, but I’ve chosen to include them, as it was really hard to find distances (in kilometres) prior to trekking.
Second note: Prices may change over time. We started the trek on the 8th January and finished on the 13th January 2018.
January 25, 2018


Love it Milly!! Great read! Great photos! Great advice for the inexperienced.
Sent from my iPhone
Great article to read about Annapurna Base Camp and helpful to those who are preparing.